It turns out, it’s really simple to make your own paperweights. Or, more accurately, it’s really simple to insert your own pictures into some pre-made paperweights for a brilliant personalised present. I always struggle to come up with good homemade presents for men, so this is particularly pleasing as you can put in any images you want and personalise it for whoever you’re giving it to…
I first tried this for my partner’s birthday and I was really pleased with the results. As was he. So pleased, that we decided to make some more for Christmas presents.
It’s a really simple and quick process, but I thought I’d share a quick tutorial, anyway, in the hope it might inspire someone out there somewhere across the online ether…
 Here’s what you need and how to do it:
Supplies
- Glass paperweights with a recess. I’ve used these 70mm round paperweights, which are the best value ones I can find online in the UK.
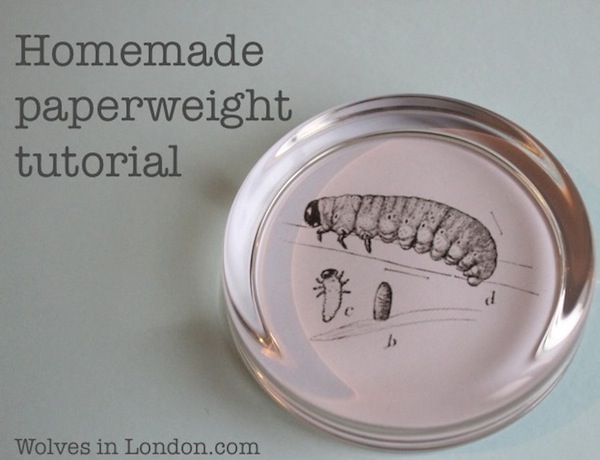
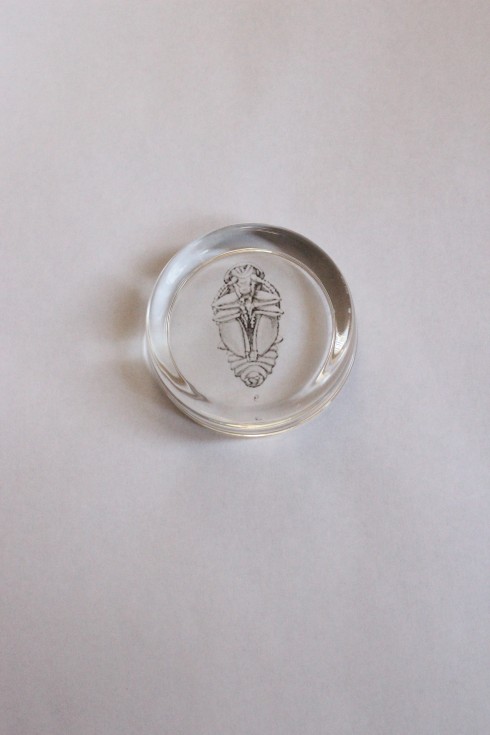
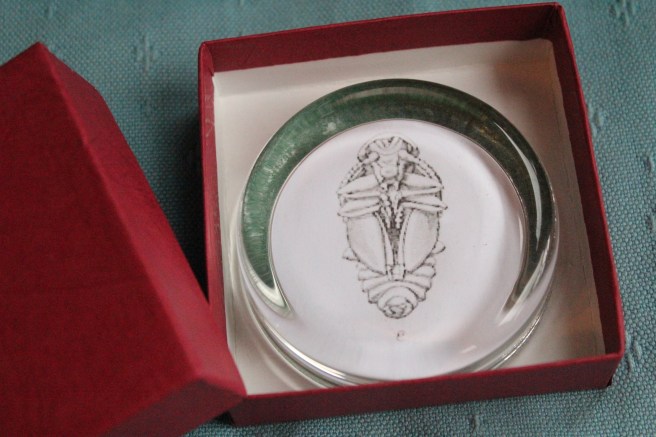
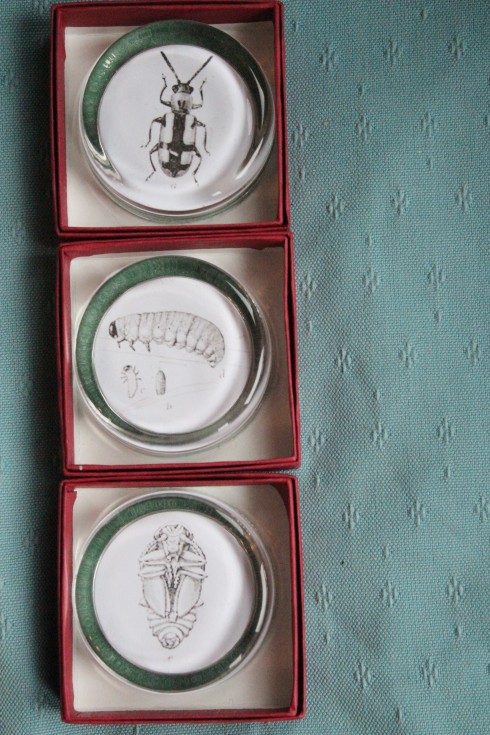
- Some graphics (or photos). I am crazy on free vintage graphics at the moment and my favourite sites to find them are The Graphics Fairy, Clip Art ETC, Vintage Printable and the NY Public Library digital archives. Warning: you could lose hours of your day browsing these sites. For this set of paperweights, I’ve used some old scientific images (found on Clip Art ETC) which show the life cycle of the asparagus beetle. Love the images, love the title even more…
- Printer
- Scissors
What to do
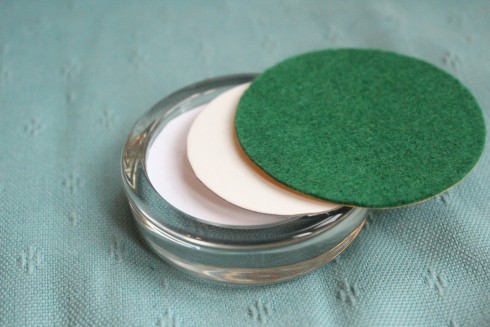
1. Unpackage your paperweight kit, which will have three parts: the glass paperweight with recess, a green bit of felt with sticky back and a cardboard circle. Check whether the cardboard circle provided fits the recess perfectly. If it does, brilliant, you can use this to draw an outline for your image. But, I’ve found with most of the kits I’ve used that the circle is either marginally too small or too big. If this is the case, draw a circle round the recess under the paperweight for the exact size you will want your image to be.

2. Print out your image onto some scrap paper. Position a paperweight over the top to check whether the image is the right size. At this point, you will probably need to re-size the images a bit to make them perfect.
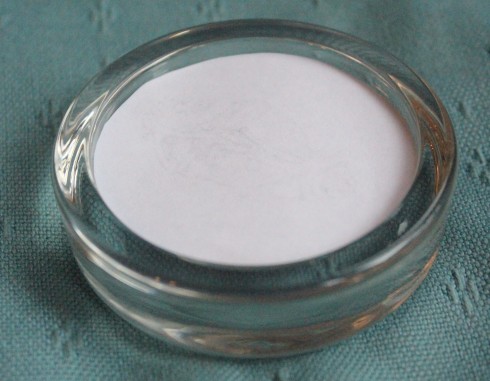
3. Once you’ve got it just how you want it, make a final print onto some good paper.
4. Cut round the image carefully and put it inside the recess, facing outwards.
5. The circle of card goes on next, with the felt on top. As mentioned, the card might not be a perfect fit, so if it’s too big trim to size and put it in. If it’s too small, try and position it in the centre of the recess, but don’t worry too much, once the felt goes on top it holds it all in place. (I’m sure you weren’t worrying that much, anyway, it’s hardly a catastrophe to have a slightly small piece of card.)
6. Check, from the front, that everything is lined up as it should. All being well, peel off the back of the green felt…
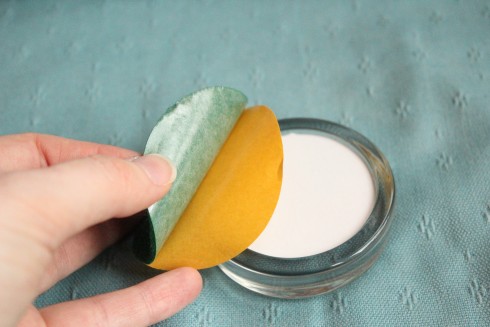
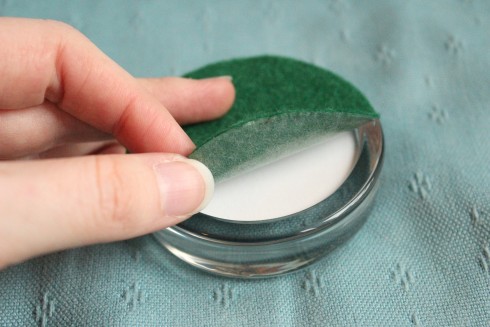
7 …and stick it on.
8. Tadaaaa, all finished:

If you get the same kits that I did, they also come with quite a nice box to put the paperweights inside. I am all about presentation at the moment, so I love a rather swanky looking red box to display the finished product.
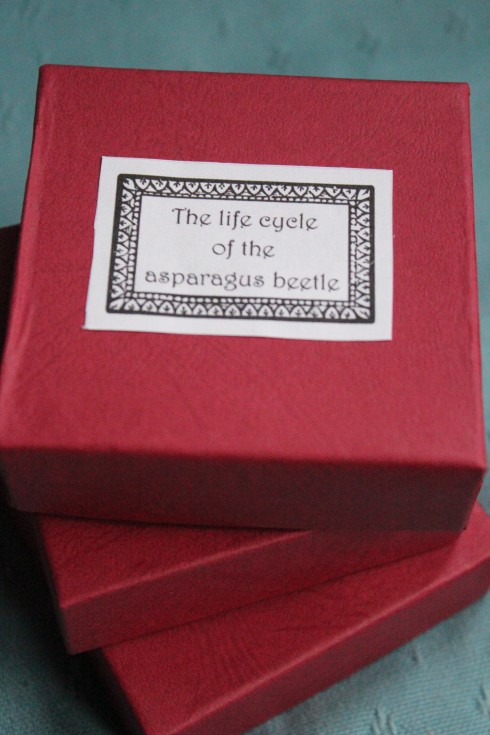
I even made a nice little label to set off the red box, using the free vintage labels from the World Label blog.
And here’s the full set, from the start of the life cycle to the end:
If you have a go at making some, do post a comment and let me know how you get on and, most importantly, what excellent images you find to put inside…
Related articles
- For some more ideas of images to put inside the paperweights, see the ones I made with vintage images for Valentine’s Day
- Not quite the right present for your man? How about some DIY moustache mugs?

Thanks “wolves in London” from Marilyn in Michigan, USA. I have some empty paper weights sitting on my desk – and along you come with INSPIRATION! Thanks! “Love the bugs!!!