Everyone tells you that organising a wedding is stressful. So much to do. So many people to coordinate. So many little things to think about.
And of course, you don’t believe a word of it.
“Not me,” you think, “I won’t be some crazed bridezilla, storming around the place screaming at people because my napkins don’t perfectly match my flowers. No way. I’ll be all chilled and laid back. And, really, how much is there to do anyway? I think I’ll try and make everything myself. I think it’s a great idea to do my own flowers. And I’ll definitely make all the favours. Oh and maybe it’s a good idea if we don’t get a caterer and just cook all the food ourselves…”
Ha ha. Okay, insert “me” for “you” in the sentence above and you get the picture. Luckily, someone a lot more sane than we are convinced us that trying to do all the food ourselves was a step too far, but we did take on most of the rest.
But actually, though I had nowhere near contemplated the phenomenal amount of tiny details you need to consider / plan / organise / book for a wedding, I don’t regret deciding to do as much as we could ourselves, and I think I managed to stay fairly stress free for most of the process…
And even if you decide the flowers are a step too far, I really do recommend making the favours. If you’re that way inclined, of course.
 I spent quite a lot of time researching different ideas for homemade favours but as soon as I saw an idea on Martha Stewart for hand stamping little bags I was won over. Firstly, I’m a little bit obsessed with hand stamping things. Secondly, we got to have our very own stamp made up! Who could pass on an opportunity like that?
There’s a (very brief) tutorial on the Martha Stewart website as well, but here’s a quick step by step for what I did, including UK-based suppliers and a few tips to get the best results.
Supplies:
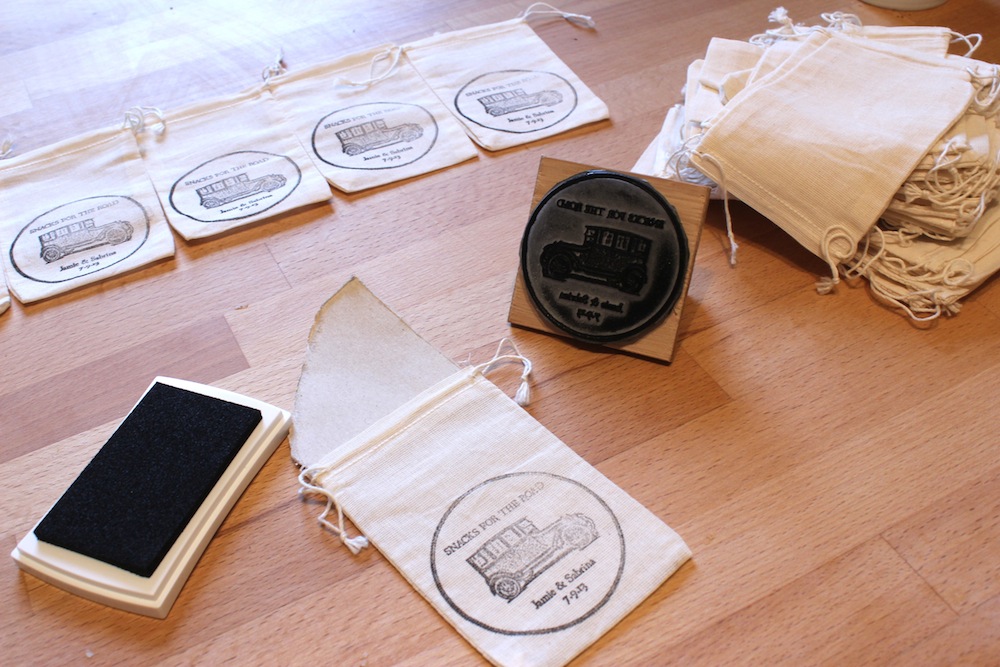
- Small muslin drawstring bags. I used a 8cm x 12cm size, which I bought here on eBay. I bought 125, which cost me £65 in total, so approximately 15p a bag. Update: as pointed out by Lynn in the comments below, the cost is of course, actually around 50p a bag!
- A stamp made up with your chosen design. (More info on this follows.)
- Ink for fabric. I used Versacraft large ink pad in real black. The pad isn’t as big as the stamp itself, but it’s raised up, so you can just hold the stamp down a couple of times to get the correct coverage.
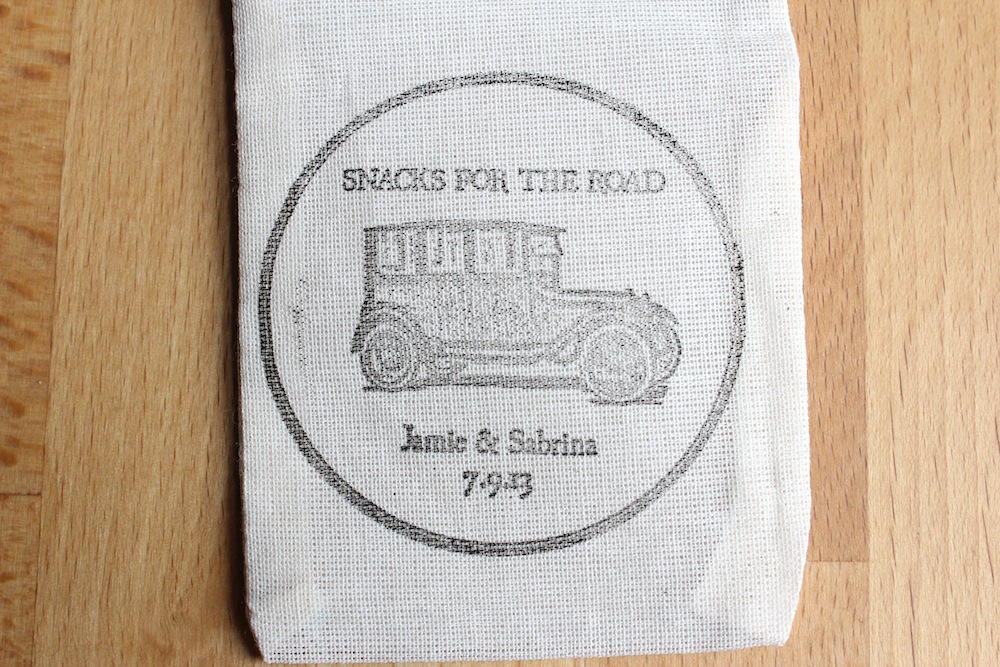
- Vintage image to create design. Our car is from the Old Design Shop: clipart vintage car.
What to do:
Step one:
To create your design for the stamp, there are two options. You can either use a variety of pre-made templates at the Martha Stewart site and just fill in your details, or you can create your own.
I used the same text, “Snacks for the road,” but made my own design as we wanted to use the same font as we’d used on our wedding invitations. I did this in PowerPoint: in a blank file use the “basic shapes” button to choose a circle. Right click on the circle, select “format shape” and you can change the fill, outside line and so on. Then just paste your image into the middle of the circle and create the text using a text box. Save as a jpeg.
Step two:
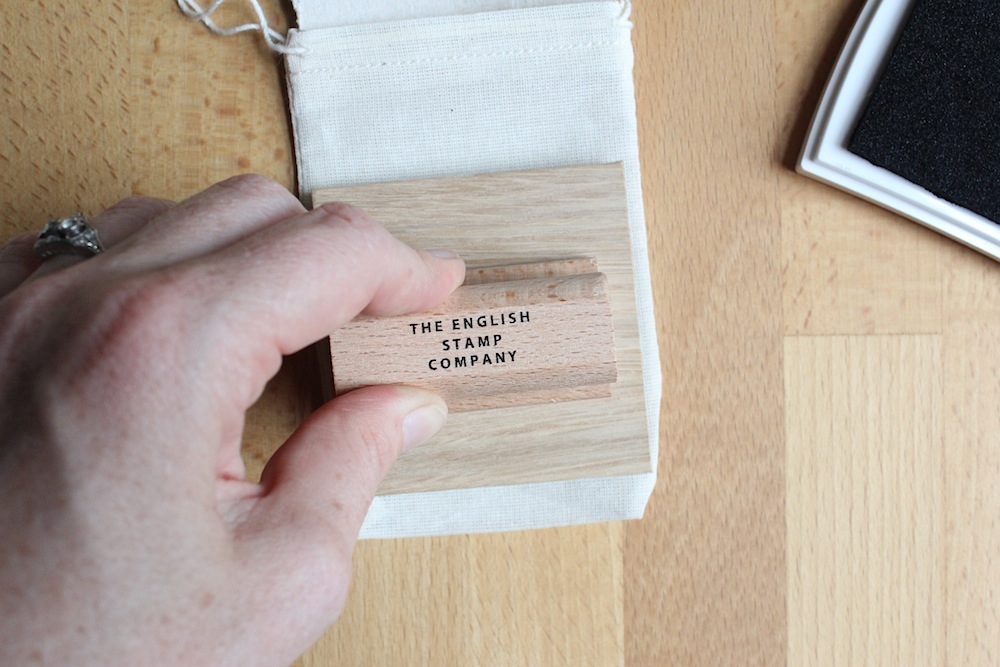
To have our design turned into a stamp, we used the English Stamp Company. They were amazingly helpful, as I couldn’t manage to upload the jpeg in a way that their website recognised, but finally I emailed it to them and they made all the alterations needed to turn it into stamp form.
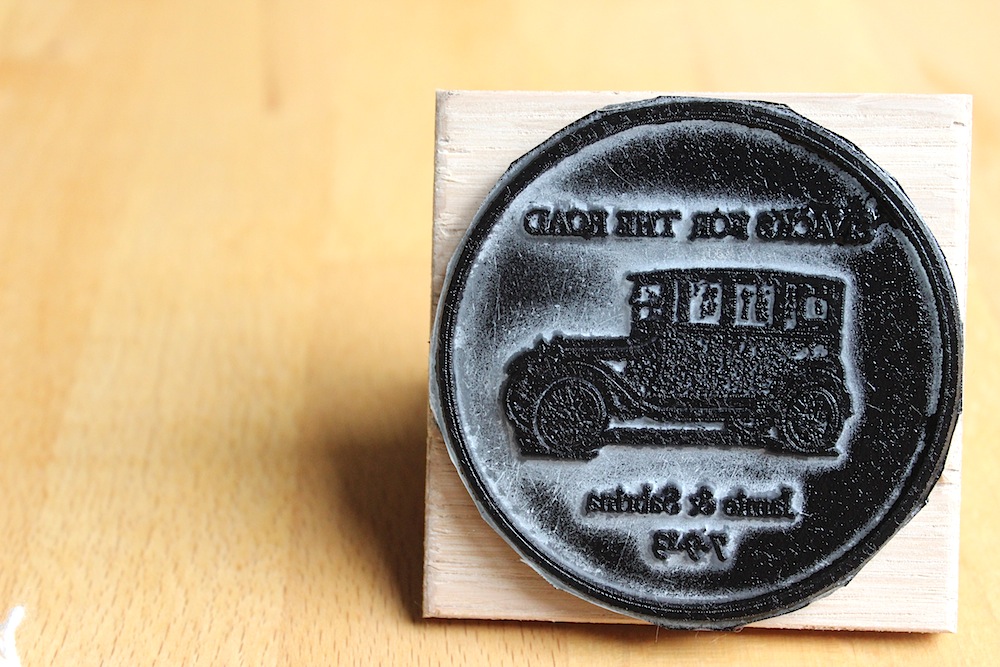
They’ll make a stamp in a huge range of sizes; to fit the muslin bags, I had mine made at a 7cm diameter.
The total cost for this was £21, which I thought was pretty amazing. I am seriously holding myself back from ordering a million more stamps so I can stamp anything and everything…
Step three:
Wait impatiently for a few days for the wonderful stamp to arrive.
Step four:
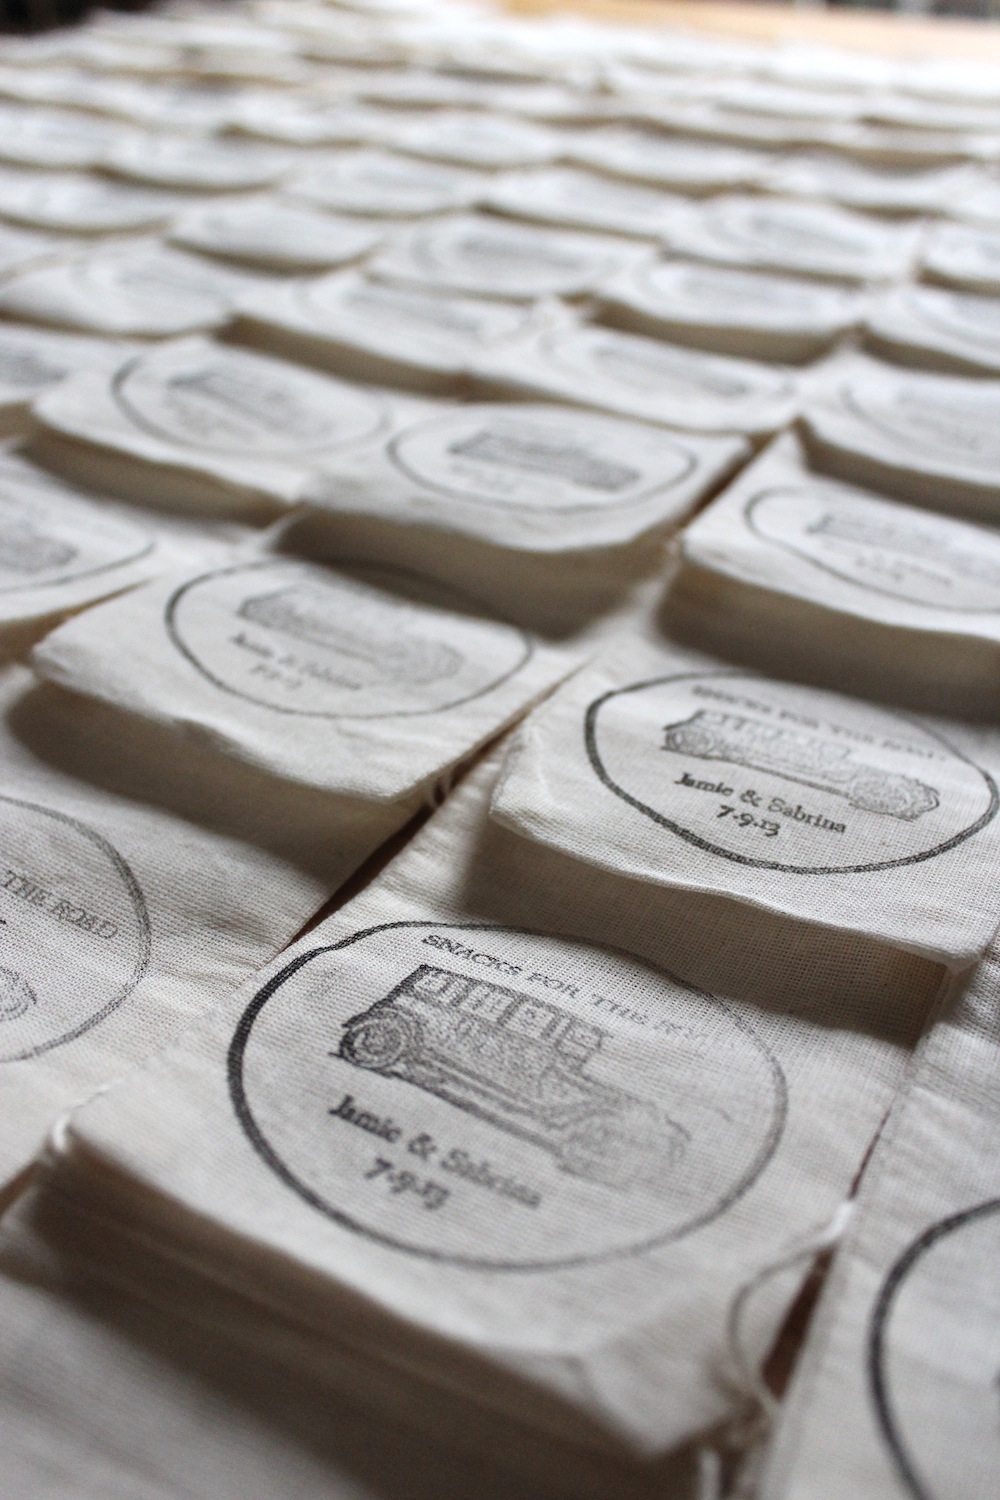
Now all that’s left is the stamping itself. Practice a few times first on paper and then attack your bags…
A few tips:
- Don’t press the stamp hard down into the pad for the ink coverage. Instead, sort of dab it across the surface, which covers it up perfectly without leaving any thick places to smudge.
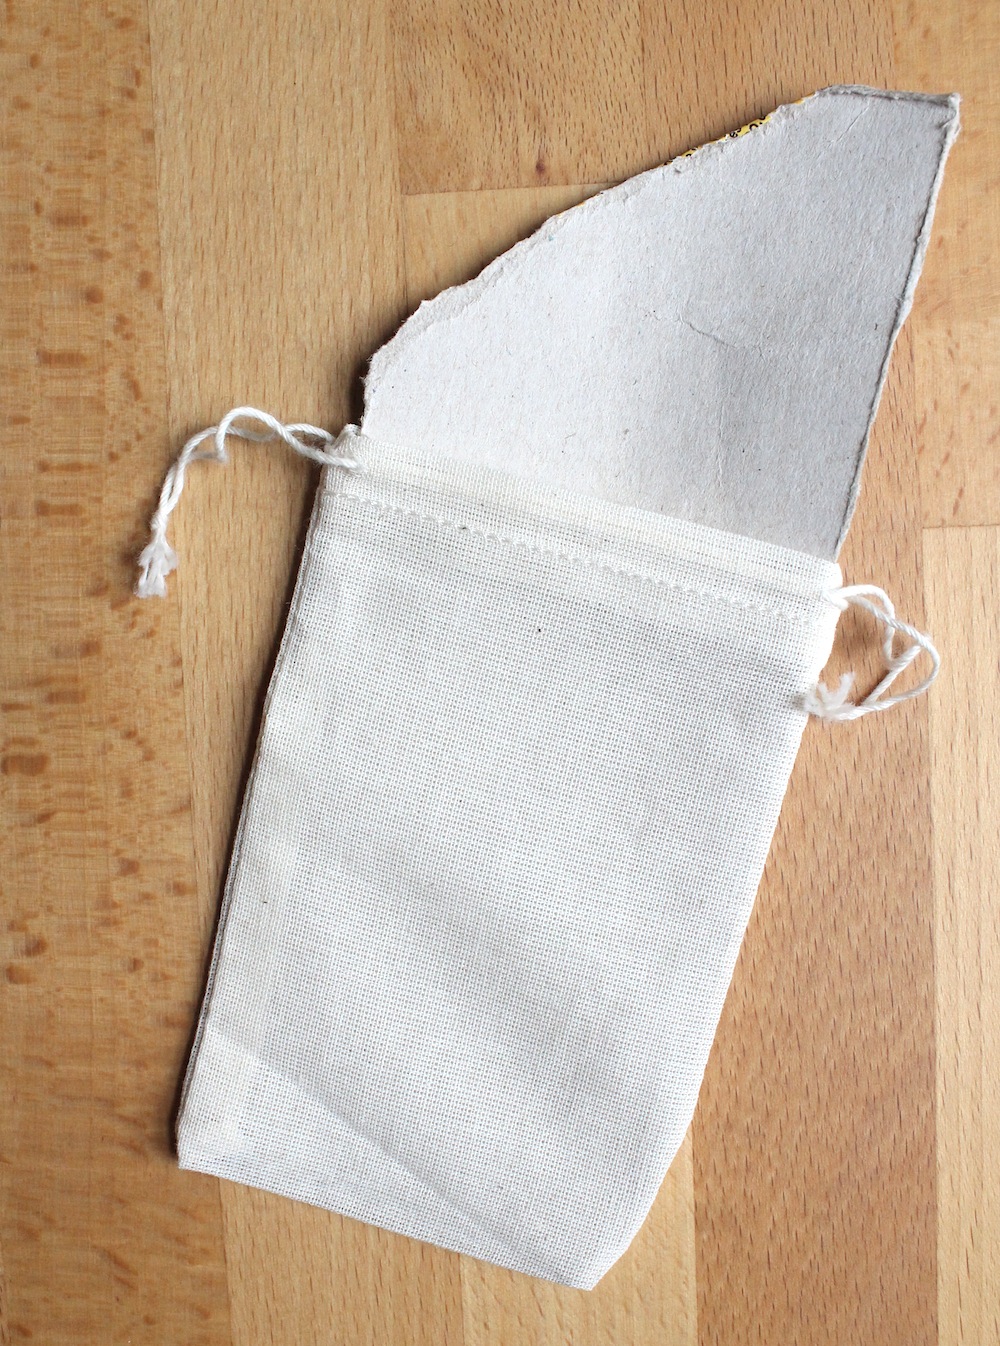
- I tore a piece of card from a cereal box and slid that inside the bags before stamping each one, to make sure no ink went through to the other side.

A piece of card looks after everything… - I found that I got the most perfect coverage if I was standing up, directly over the bags and if I used both hands to press the stamp firmly down.

It took a few attempts to get a perfect coverage of ink
Step five:
Leave to dry. I left mine for 24 hours just to be on the safe side, but they seemed dry long before that. In order to set the dye, you need to just press lightly down with an iron for a minute or so on each image — with the steam setting turned off.
Step six:
Fill with some little morsels of deliciousness. We made vanilla fudge to go in ours, which was a part success, though it was perhaps a little bit too sticky. I had originally wanted to make some peppermint cream hearts (a bit more rrrrrrrromantic as well) but decided against it because of the raw egg white involved and the knowledge that there would be a few pregnant people there.
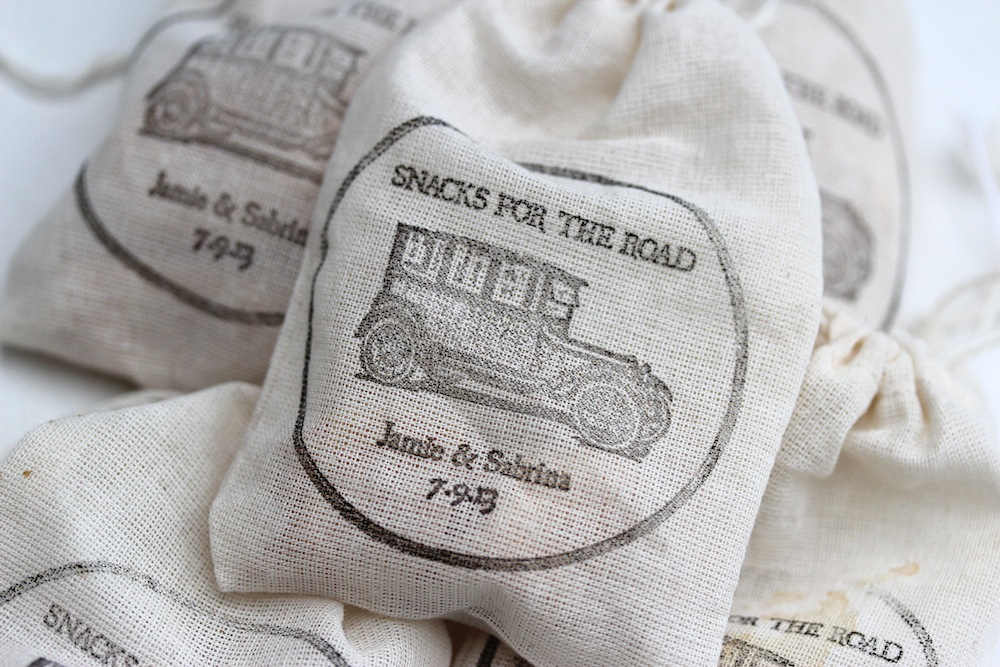
We made these favours double up as place names as well, by tying on a luggage label with people’s name hand stamped onto it. I used the same method for these gift tags. It was a nice effect, I thought…
These bags are great for wedding favours, but of course you could do something similar for a children’s party bag or a box for jewellery or a huge, huge range of things.
If you have a go at this, do let me know what wonders you’ve conjured up in the comments below.
Related articles:
- Want to see a few photos of the wedding itself? Step right this way: our wedding.
- And if you’re planning a wedding too, and are wondering about what you bits you can do yourself, take a look at my tips for arranging your own wedding flowers. This was another DIY I was really pleased we took on (not least because it certainly saved us hundreds and hundreds and pounds…)
- Naturally, I had a Pinterest board to store all my inspiration when I was planning the wedding: Wedmin

By the fact you’ve posted this great tutorial, I know you won’t mind me completely copying this for my wedding!
Oh yes, please do! I was really pleased with how these turned out and it didn’t take too long to make them, either. I found the stamping quite therapeutic and managed all 120 bags in just over an hour…
I just wish I had an excuse to use the stamp again!
love these, our wedding is over but these would be nice to hold little christmas gifts in. cant wait to try 🙂 Lx
Oooh, yes, they’d be lovely for stocking fillers!
These are lovely … such a great idea … Bee xx
Your favours are lovely and would make great gifts at any time of year really. I am a bit confused about the cost though, as 15p each seems very reasonable. If you paid £65 for 125 bags, doesn’t that make it 52p per bag? Sorry to be a Carol Vorderman!
Ha ha, thanks Carol, of course you’re totally right! (I am always bad at the numbers bit in Countdown too…)
These are absolutely gorgeous! Thanks so much for the mention of the vintage car from my blog. I’ve pinned your favour bags here: http://www.pinterest.com/julieannjj/your-crafts-and-designs/ and here: http://www.pinterest.com/julieannjj/arts-and-crafts/
Julie
The Old Design Shop
These are so cute! Definitely a lot of stamping there, huh? Found you through “This blog is not for you” 🙂
Thanks Anja. Oh yes, lots of stamping! I find it quite relaxing though…
Dear sir.
We M/S A.Q.Tex. is manufacturing unit,working since 1998
under quality certificate of ISO 9001-2008.
We have clintage all over the world.Our experties are Textile
made up bags.
We could supply excellent quality on compitative whole sale prices.
Our products are Tote Bags
Bib Aprons
Table Napkins
Drawstrings Bags…..ETC.
Please revert if you have any such demand.
Have a nice day.