I’m a complete curmudgeon when it comes to advance Christmas preparations.
Don’t get me wrong, I absolutely love Christmas. Just not in September. (Or August, October or November, for that matter…) And, as we all know, September is generally the time you start seeing Christmas bits and pieces popping up.
The first few times you tut to yourself in whatever giant multinational supermarket you happen to have popped into, “Tch, Christmas cards and advent calendars and it’s still September. Idiots.”
But, before you know it, the insidious pan pipe Christmas Carol music has crept into your brain and you’re feeling all Winter Wonderlandy and tinselly. And then, bamm, the middle of November hits, all of your Christmas joy has been used up already and you’re yearning for your next summer holiday.
So every year, I guard myself carefully against any Christmas thoughts at all until it’s December.
And so it is, that I have just, a few days in advance, allowed myself to think about making an advent calendar. And this is it.
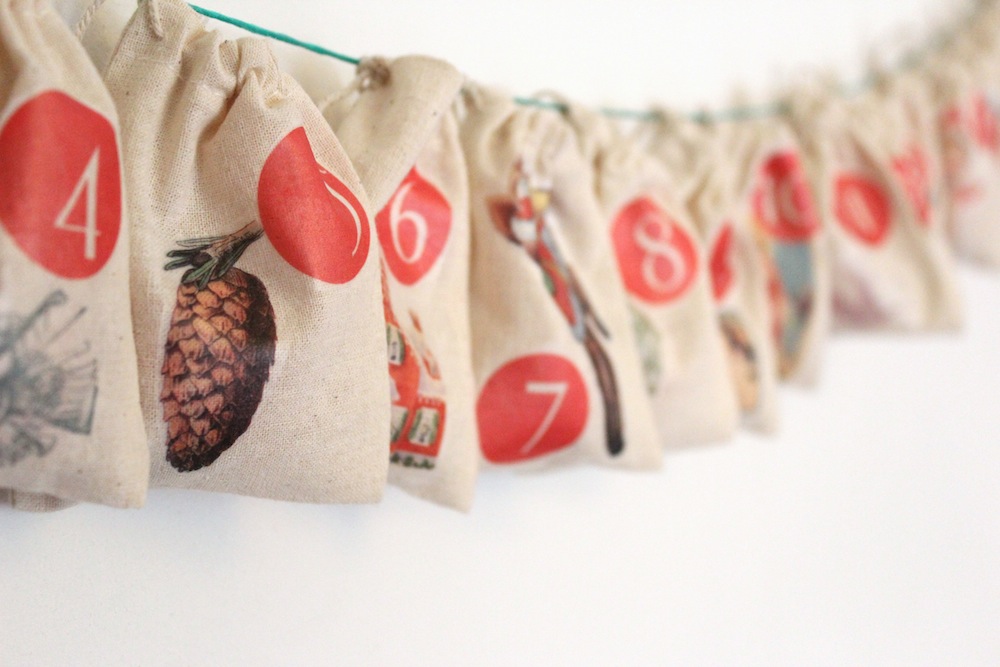
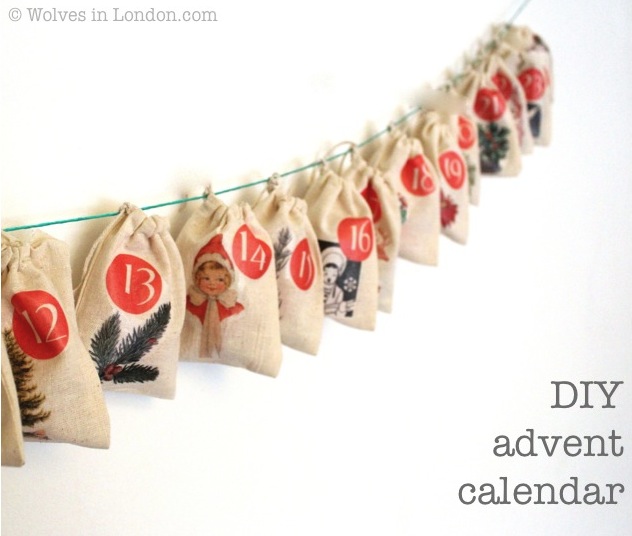
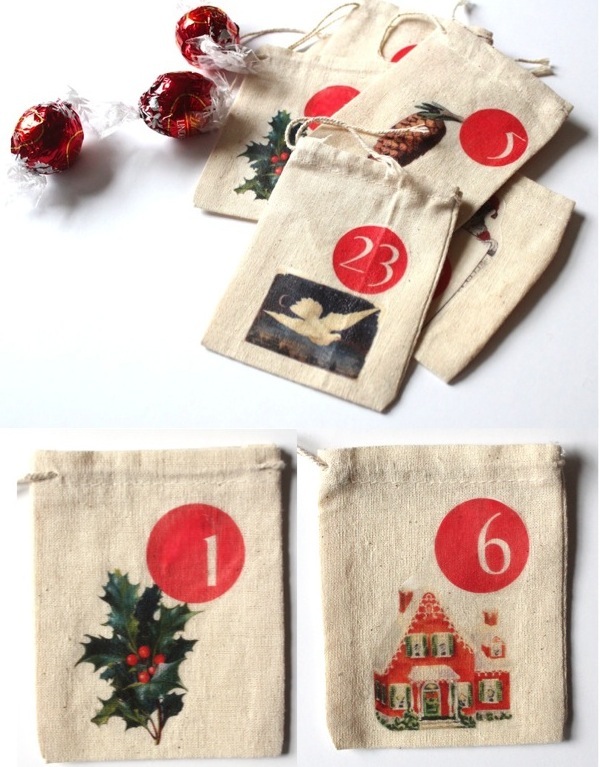
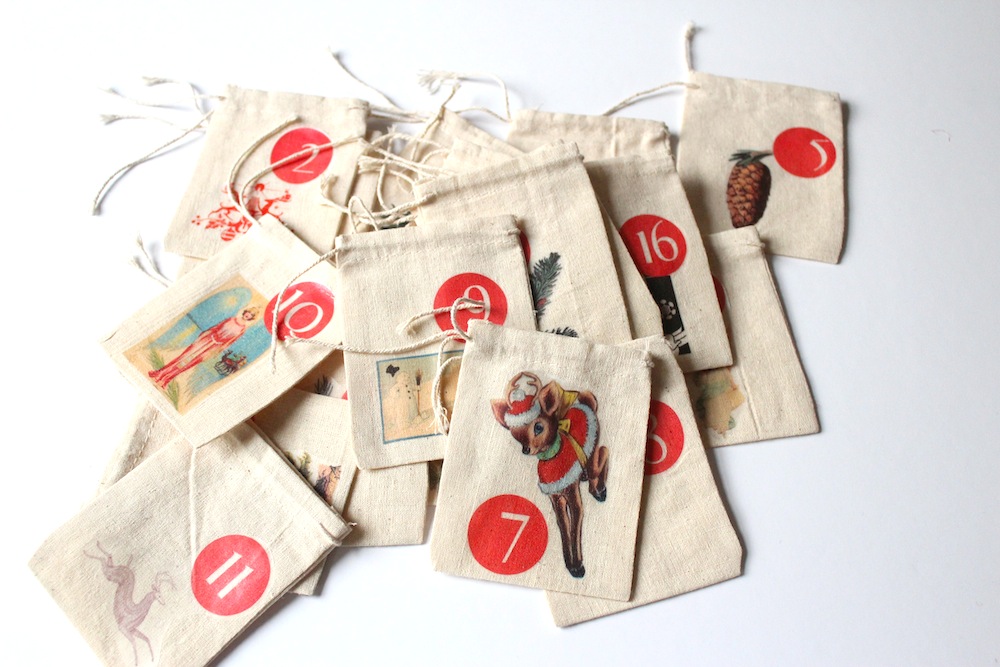
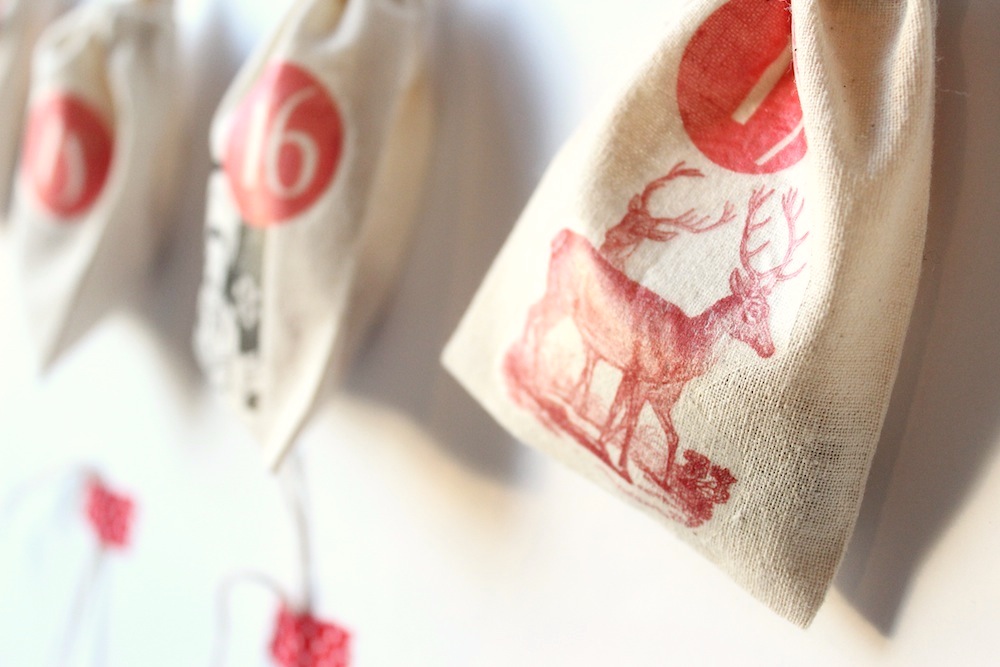
Lots of gorgeous little numbered bags stuffed full with chocolate and decorated with jolly vintage pictures, all found on the wonderful Graphics Fairy website. Here are a few of my favourites:
If you’re a late preparer like me, and would like to make yourself one, I’ve put all of my images into a pdf and there are some really straightforward instructions below.
So, joyeux Noel, all. May the mulled wine drinking and mince pie eating officially begin!
Supplies:
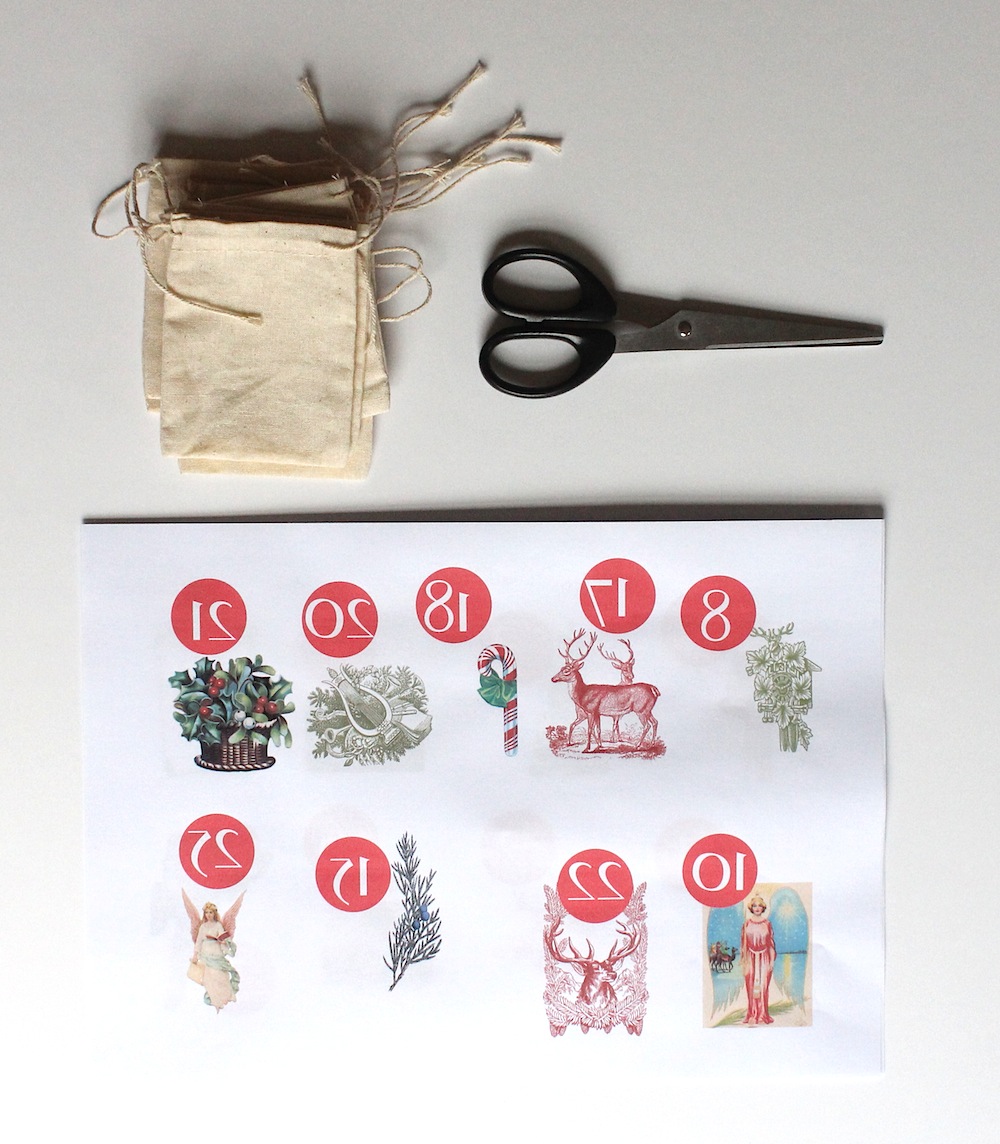
- Small drawstring bags, approx. 9cm x 7cm. (I ordered mine through eBay ages ago, mistakenly getting a size that was too small for our wedding favours. Luckily, they were perfect for this purpose…)
- This pdf template with all the images and dates
- Some iron on transfer paper for pale fabric
- An iron and scissors
What to do:
- Print out the pdf onto the iron on transfer paper. (The numbers and images are backwards, but don’t worry, this is as they should be!)
- Cut round the images leaving a small border of a few millimetres around the outside of each one.
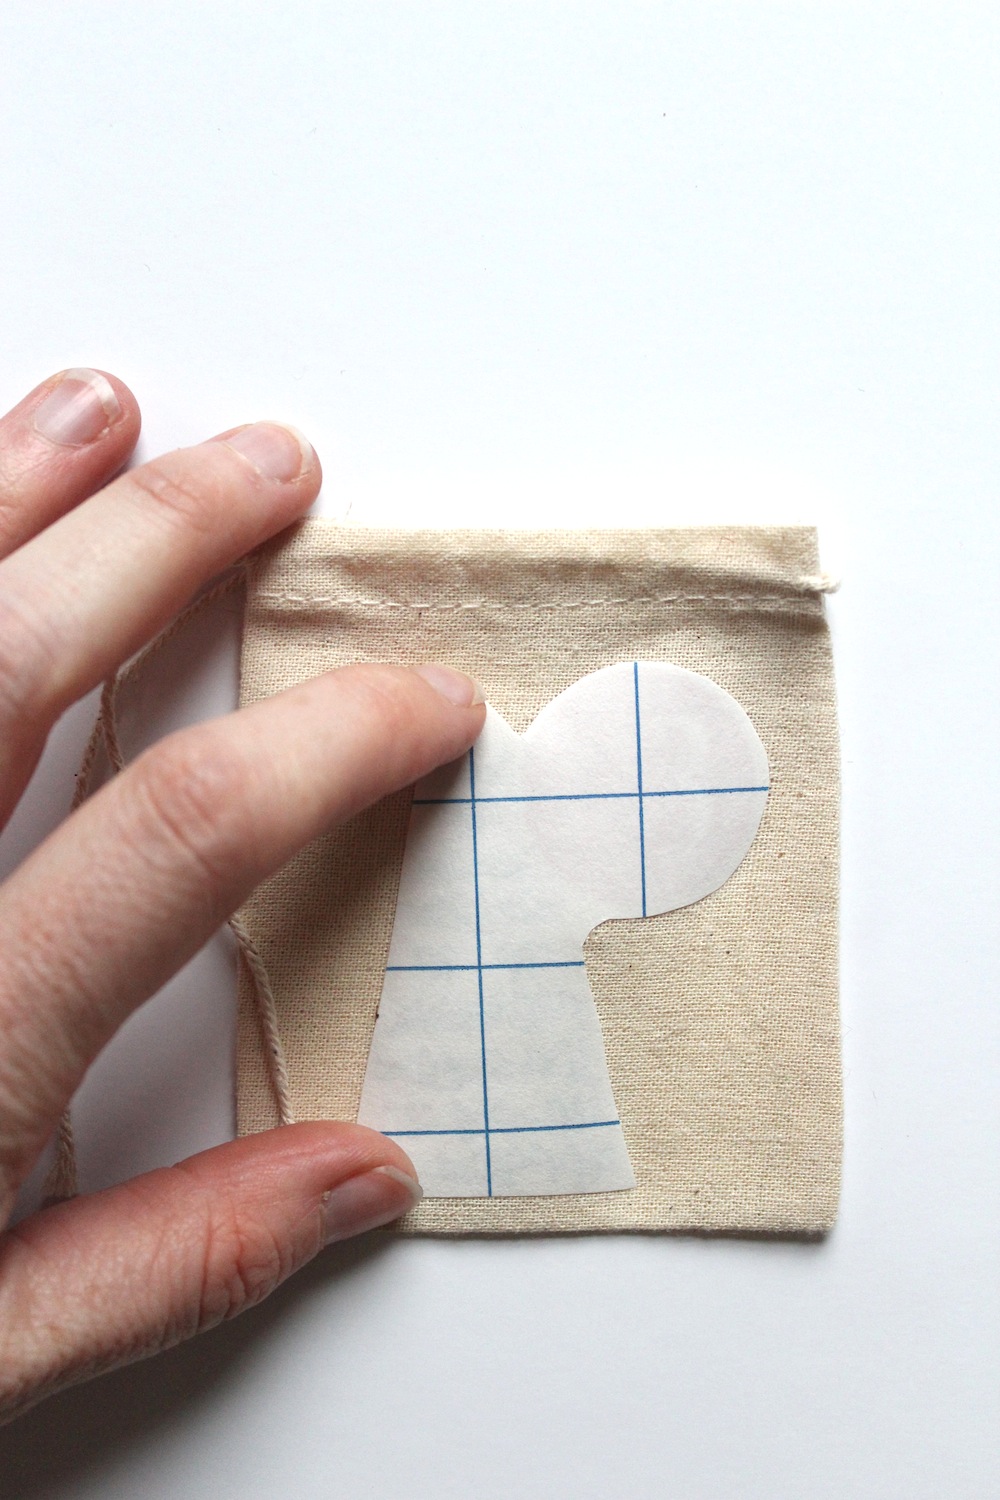
- Position an image, face down, onto a bag.

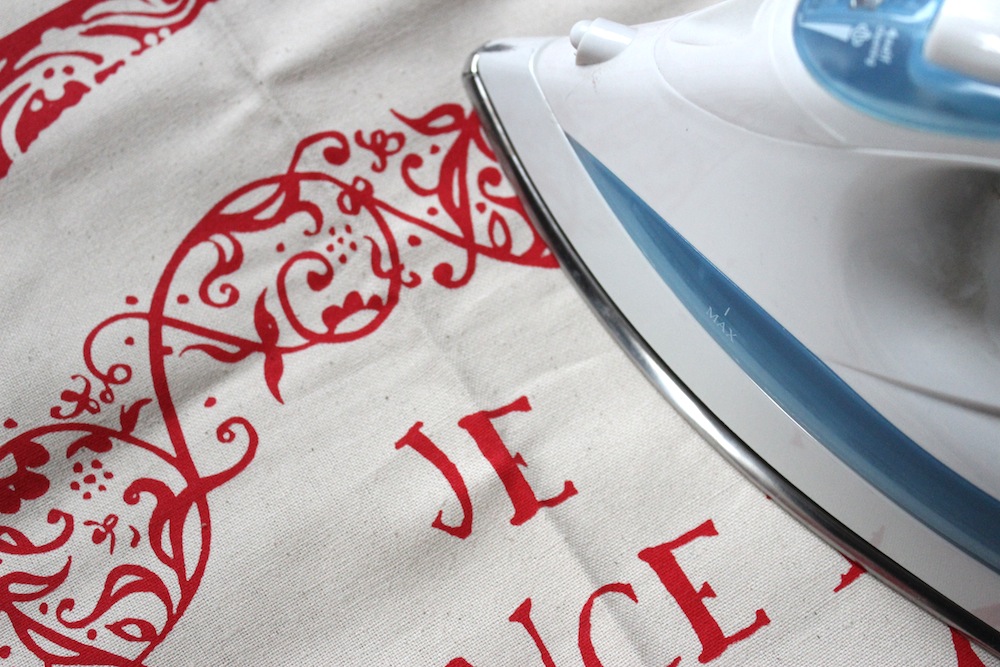
Use the grid on the back to make sure the picture is straight - Cover a wooden board (or your table) with a tea towel and, with the iron at its hottest setting, but the steam turned off, iron over the image for about 90 seconds. Make sure you cover the edges and especially any corners. (You can’t use a normal ironing board, because it’s too soft for the iron to really press the image onto the fabric.)

Nice tea towel, isn’t it? - Leave the transfer until it’s dry (you can iron on another one in the meantime)
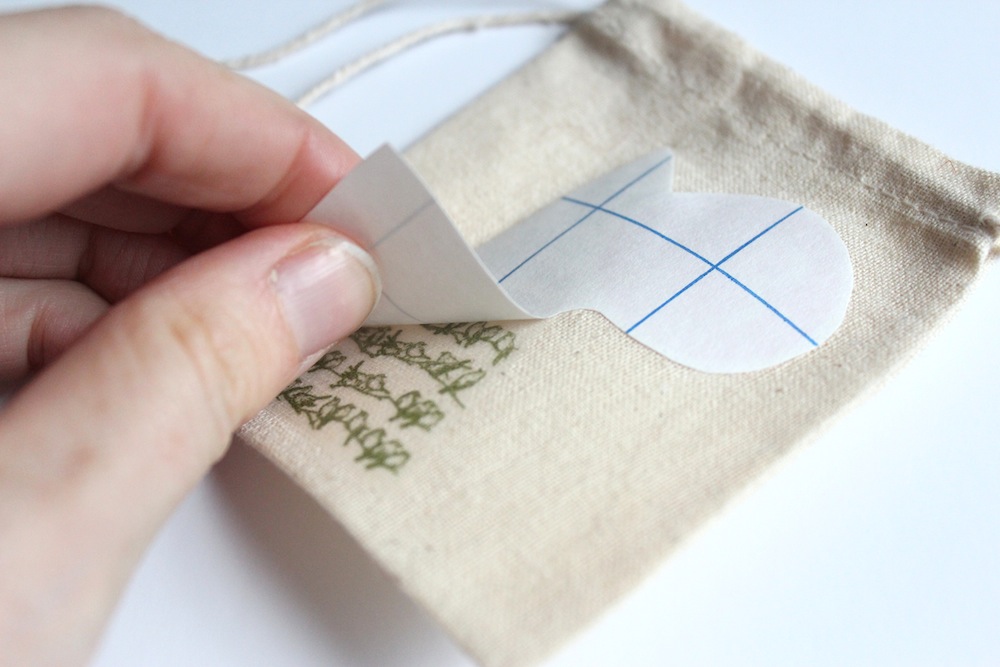
- Carefully peel off the backing and tadaaa, you have a lovely little bag

Start at a corner and gently pull the backing off 
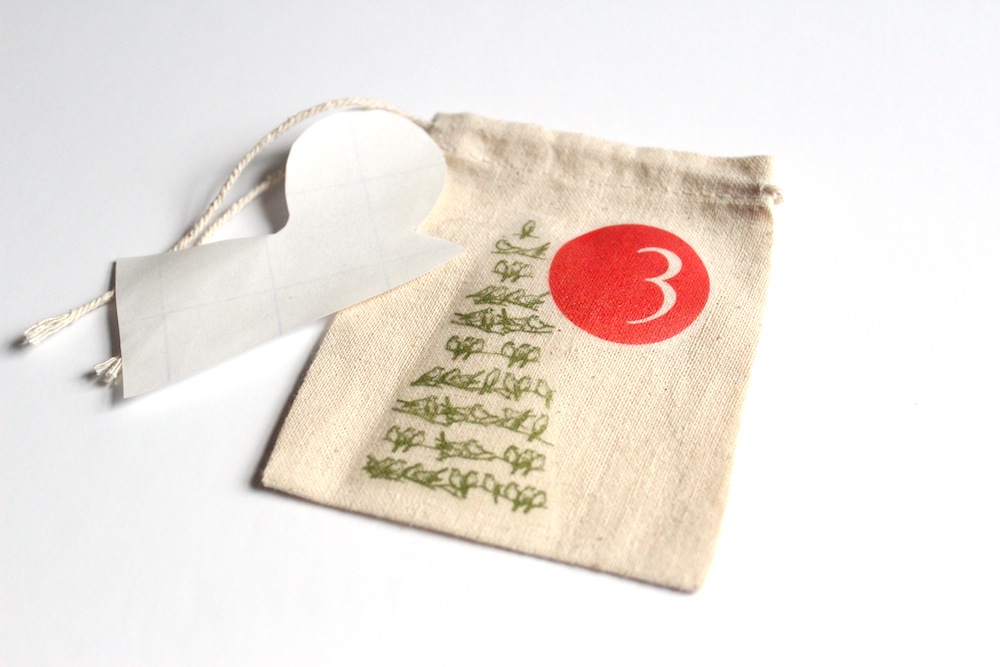
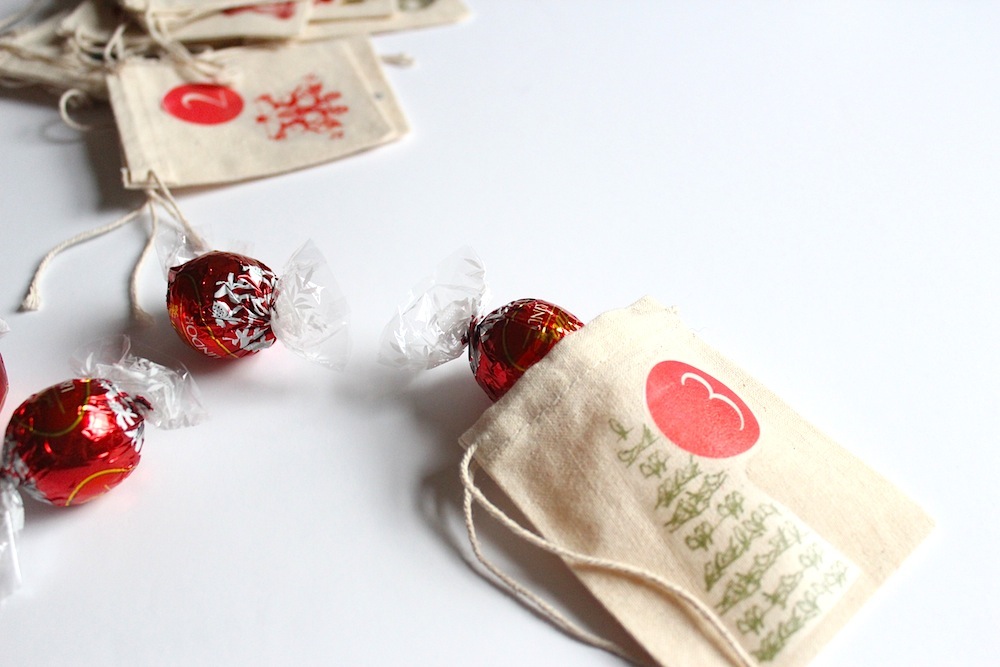
Bag one, finished. Only 23 to go… - Stuff with a chocolate, tiny presents or diamonds. Whatever floats your boat.

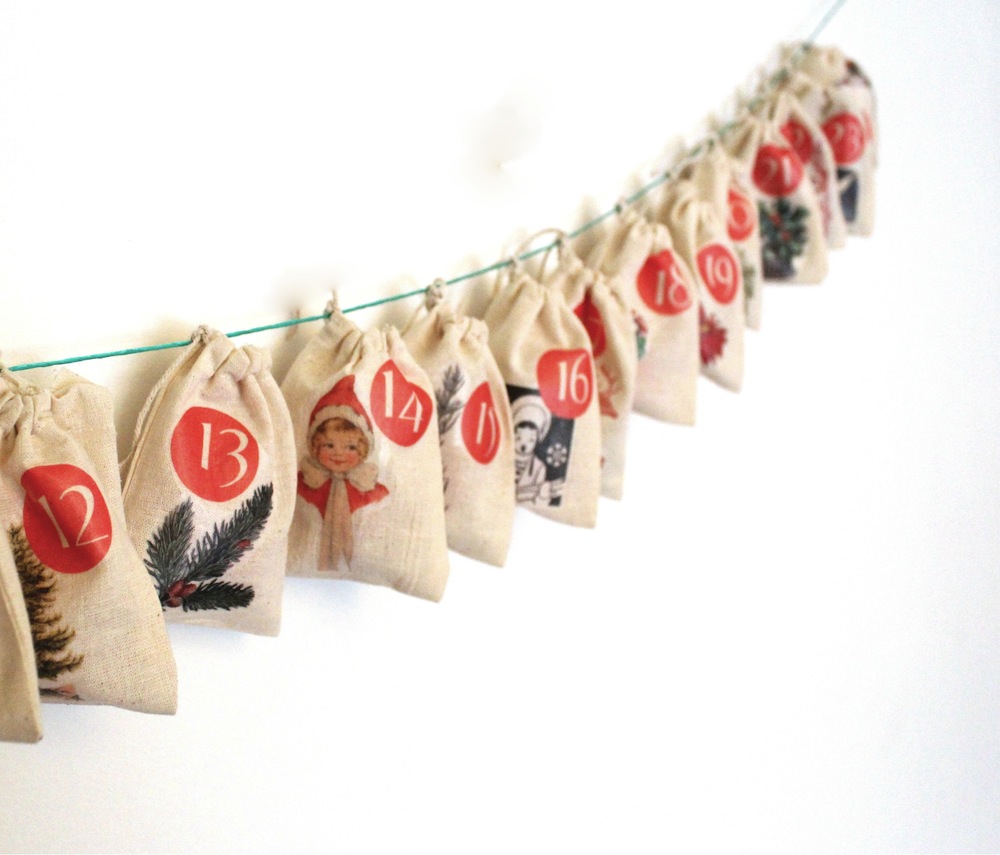
The perfect size for a Lindt Lindor, aka, the best chocolate ever created - Repeat until all bags are finished and then hang somewhere festively…

A lovely pile waiting for a treat 
I think they’d look very nice strung from a Christmas tree too 
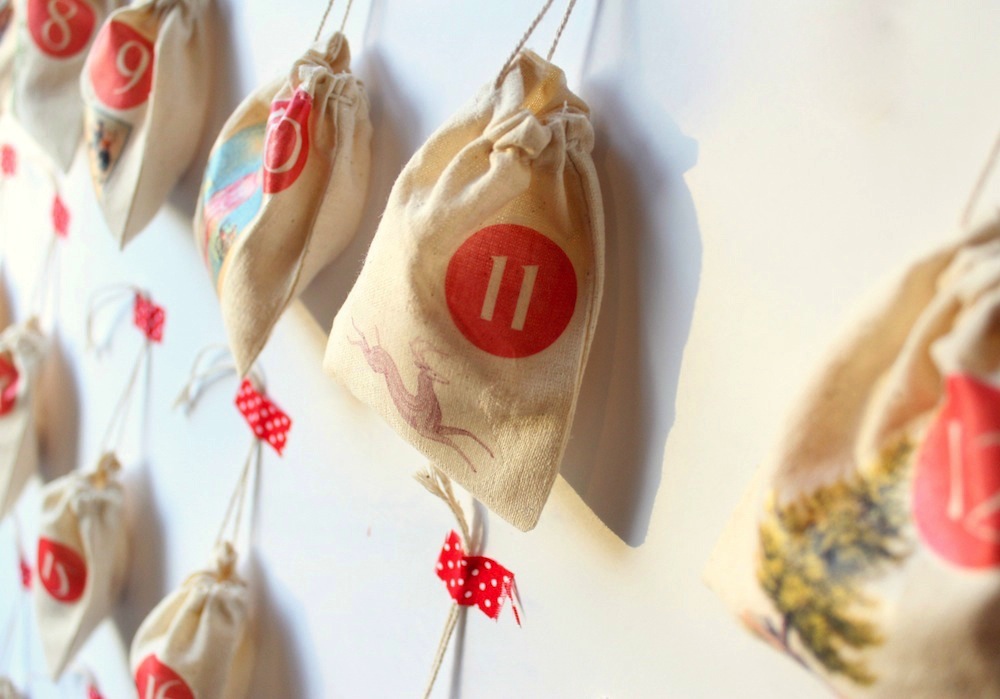
Or use a bit of washi tape to hang them from the fireplace… 
Ah, just one more photo, so you can see this nice reindeer
If you want a bit more info on the process, check out my step-by-step tutorial for ironing images onto fabric, or my tips and hints for getting the best results.
I’m a traditionalist with advent calendars and only go up to December 24th, but I’ve included a 25 in there too for any of you newfangled crazy modernists out there.
Hope you enjoy this and do leave me a comment if you make one yourself.
Related articles:
- I know that there must be lots of people out there waaaaaay more organised than me, because the round-up I put together last year for the top 20 tutorials for homemade Christmas presents has been getting lots of interest in the past few months

Brilliant! Such a great idea.
Excellent idea! Not unnaturally, I’ve pinned it.
I’m one of those who has been trying to contain their Christmas excitement since September – LOL! Lovely idea and great (simple) tutorial 🙂
I want to try this!
I love, love, love it … the graphics are beautiful … Bee xx
Oh so beautiful! How clever, I’ve not used transfer paper before, and am now thinking of millions of things to use it on. CUSHIONS! Thanks for joining my link up too xx
I’ve been meaning to do cushions for ages as well! Though, it does leave a bit of a shiny surface, so that might look a bit weird on a larger scale…
Obviously I’m a little late to the party – being the 1st and all. But these are gorgeous! I’d say next year, but I’m wondering if next year might not just sneak up on me too. Perhaps I’ll have to think of a good use for this idea in the meantime! Having a hard job getting my head around Christmas in the summer after years of cold Christmas’ … I just hope I get enough presents in time.
I love these! Haven’t used iron on transfer paper…must get some!
Thanks all, for lovely comments. I definitely advocate an experiment with some iron on transfer paper, for this, or something else!
Love this! And the Lindt balls are a very good choice 🙂 Really like the graphics on the bags.
Absolutely gorgeous. I’m pinning this for next year!
This is just adorable – LOVE it! 🙂
#Pintorials
THis is really cute….thanks for the tip about ironing on a table. I always have trouble getting the transfer to actually transfer clearly. Just a beautiful project, TFS!
Thanks LeAnne… yup, a hard surface makes them stick much better. A bit of trial and error for me on that one too! Now I use a wooden chopping board with a tea towel on top…
This is quite possibly my most favorite Advent calendar ever! I love the little muslin bags, the simple color palettes and the wonderful vintage images. I’m pinning this!
Awww, thank you Kathy, what a lovely comment!
This is probably the simplest and most beautiful advent calendar I have seen. Thank you sharing your talents with us, I love the images you chosen for the project.
Thanks Lori, what a lovely thing to say…
Lovely!! Thanks
This was so gorgeous I made one for my daughter right away and it turned out fabulous. I would like to give a set away as a gift to my regular Face Book followers – I won’t be making any money or anything, just a nice “black Friday” gift for those who have followed me for the last few years. Do I have your permission to do that? I’m also asking Graphics Fairy if she will allow it since she originated the graphics. I will obviously do a link back to your blog – or your FB page if you have one and would prefer it. Thank you for your consideration – Kelli from Kelli’s Kitchen.
Hi Kelli,
Thanks very much for your message and I’m so pleased you liked it! Yes, by all means do give away as a gift, as you say, a link back to the relevant blog page will be perfect. (I’m not great on my Facebook page, so the blog would be better…)
Hope you have a lovely Christmas!
Sabrina
Yay! Thank you so much!I will let you know when it goes up!
Best project through Graphics Fairy. Very pretty and beautifully carried out.
Wow… just what I was looking for! Thank you!