Waaaay back in December I told you about some homemade soaps I made for Christmas presents. I said I had great plans for the packaging, which I was planning on sharing if they came off.
Well, I’m sure you’ve hardly been able to concentrate in 2013 for wondering, nay, worrying if it all came together in the end. Perhaps you took my silence on the matter as a bad sign. You feared, I am sure, some packaging catastrophe had occurred, the memory of which was so upsetting for me, I couldn’t bear to re-live it on my blog. (“It’s a safe place,” you wanted to reassure me, “you can share anything here…”)
Worry not, though, my boxes came off a treat – better than I could have hoped. My wait was just because I wanted to pester my partner into helping me get a template for them into pdf form to share with you all… (I’m a bit of a thicko when it comes to any sort of design work on the computer, so even this basic use of lines was a bit beyond me…)
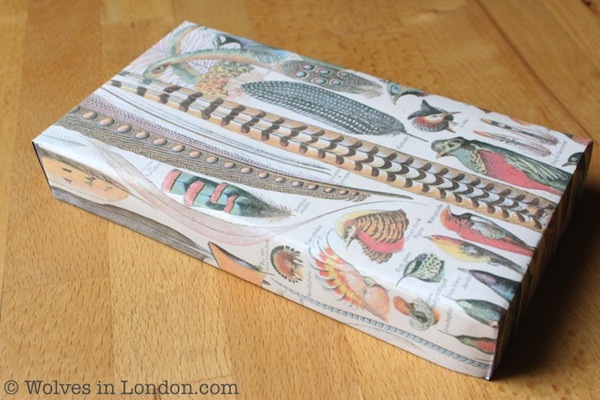
So this was the final result:

Attractive, no?
I’d tried a few other templates I’d seen first, but none worked properly for the size of my soaps.
So I drew the dimensions I wanted on a piece of A4 and, a bit of head-scratching later, realised that you actually only needed to make four straight cuts to create a box and decided to just make my own. Away I went…
I bought some nice ocean coloured card to make the box with and used one of my favourite vintage labels, which are free to download at the World Label blog. Obviously, the ribbon was the final touch…
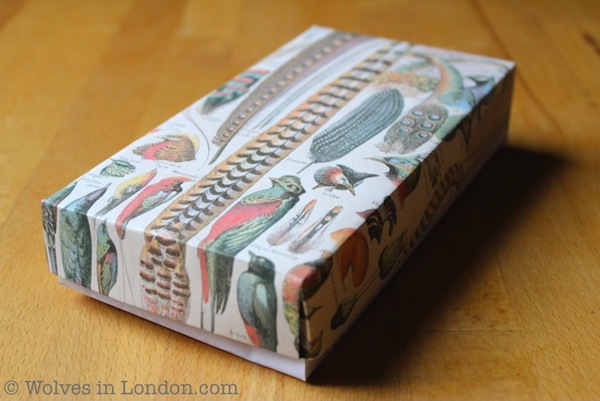
But back to the present day. Two months later, with the template finally ready to share, I tested it out by making a second box. For this one, I used a sheet of A4 printed one side with this gorgeous feather image, from the Graphics Fairy blog, and on the other with my template.
All went well! So the suspense is finally over and the tutorial and template follow, in case you’ve got a hankering to make your own gift box too…

Supplies
- A printer
- A piece of A4 card or paper. As the side you print the template on will form the inside of the box, you could use some coloured card, or simply print a nice design onto the other side of the paper.
- Glue or sellotape
- This pdf gift box template
What to do
Step 1. Print out the template onto the blank side of your A4 sheet of paper or card. Most printers automatically put a border around the outside, so select “Actual size” as your print setting.


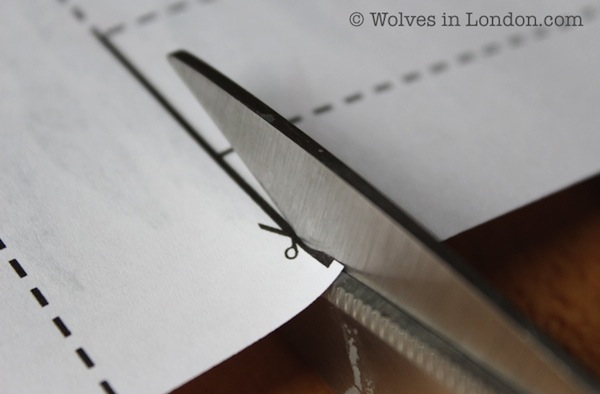
Step 2: Cut along the thick black lines marked with scissors (you could have figured that out on your own, couldn’t you?)
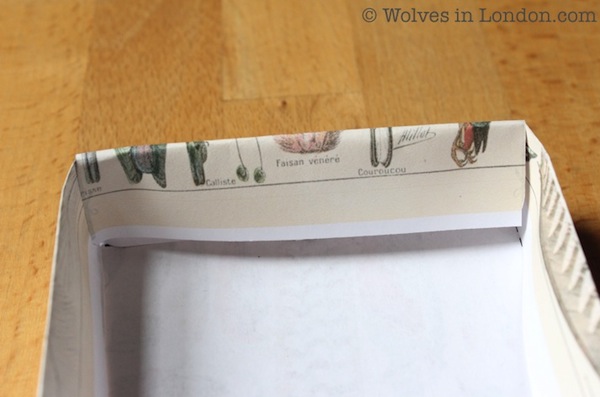
Step 3: Fold all of the dotted lines inwards, so the fold is towards you.

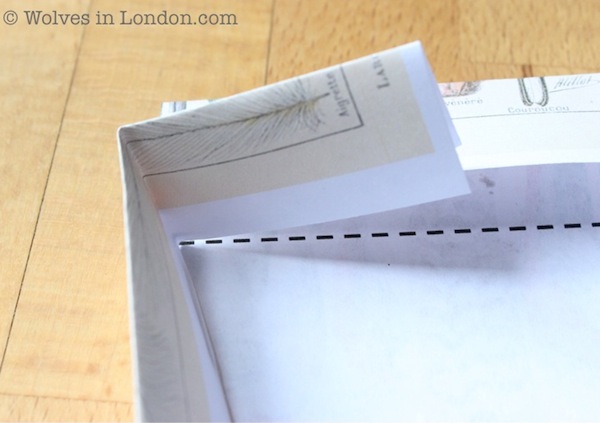
When you’re finished, it will look something like this:

On the two long sides, you now have an overlap at the left and right hand corners:

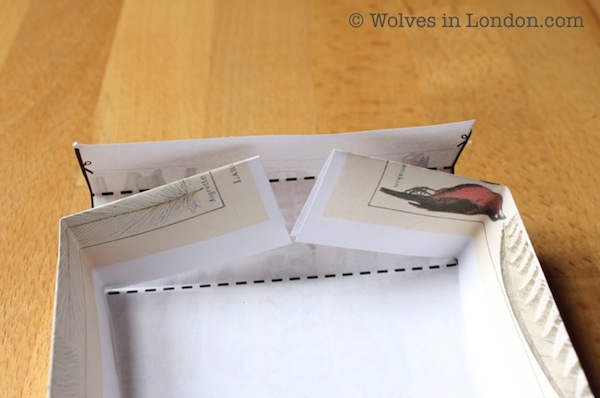
Step 4: Fold the long side flaps towards you at a right angle for each of the four corners
And the whole thing will look like this:

Step 5: Lift the short side flaps up and insert the long side corners underneath them.
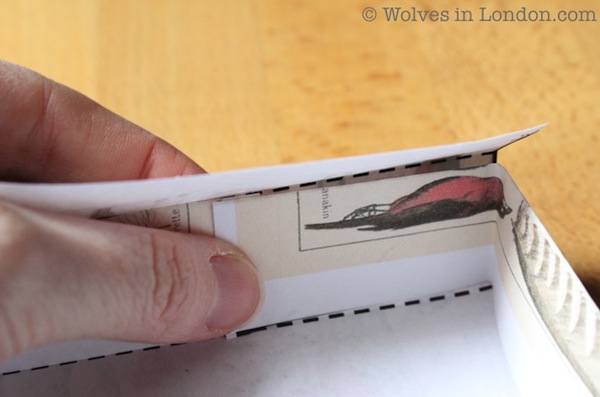
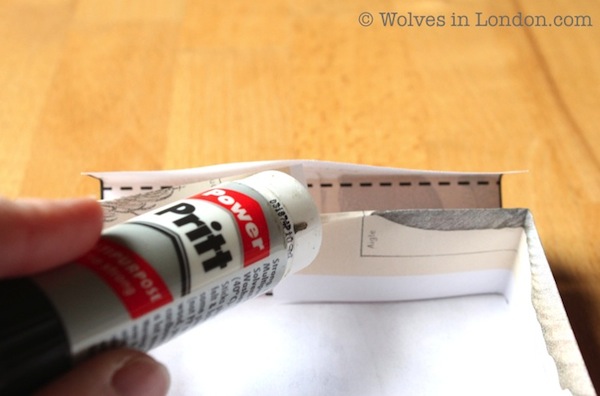
Step 6: You now have your basic box, though the inside flaps are a bit, well, flappy still:

Step 7: Glue or sellotape into position.
Which gives you nice crisp corners
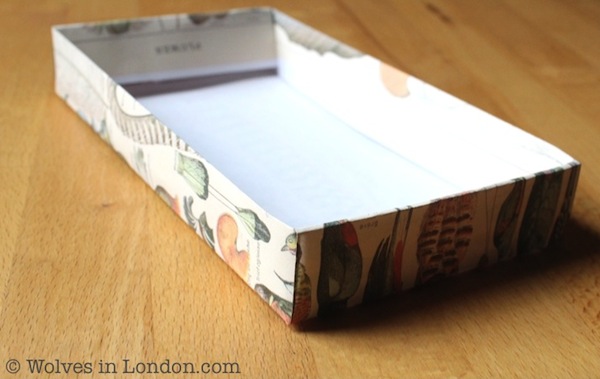
Step 8: Turn over and you’ve finished the top of your box!
Step 9: Take a moment, if you like, to admire the lovely details of your chosen images.

Step 10: Repeat all the same steps on a piece of plain paper for the bottom of the box, and place the top over it…

This template will make a box of 19x10x3cm, but of course you could alter the dimensions and make a box of any size you need.
Enjoy! And if you do make up one of these, do post a comment to let me know how it goes…
Related articles
- Stamp your own gift tags
- If you’re a packaging fan like I am, take a look at my Pinterest board wrap it up for more wrapping inspiration.
- And head over to my tutorial for making your own soaps (the easy way) for something to put inside the box!
Update: I’m chuffed that this was chosen as a feature at the following blogs:


Such a fabulous box! Thanks for the template! I found you at the 36th Avenue. Your blog is delightful. Thanks for stopping by my place when you have a chance. ~ Blessings, Tracey
Thanks so much Tracey!
nice tute
Gill shoogliecrafts.blogspot.com
So pretty and a great tutorial. I have pinned it!
Sweet project! Visiting from ISBMUTF.
thriftshopcommando.blogspot.com
What a great tutorial! I would love for you to share this or any of your great ideas at the link party going on now (and every Saturday through Tuesday) at ‘Or so she says …’ Hope to see you there! http://www.oneshetwoshe.com
Wonderful tutorial! I loved the outcome!
Great post!! I included it in my post Βόλτα στη Γειτονιά #25 🙂
Have a great week!!
Super fun project! You’re featured today at Mop It Up Monday. Have a fabulous week!
This fabulous project has been featured at this week’s Craftastic Monday link party at Sew Can Do & its Pinterest board. Grab a Featured On button & thanks so much for linking it up!
Just returned from a weekend in Dublin, without access to the internet, and am so excited to find all these lovely messages saying these boxes have been featured! Thank you all so much, I really appreciate it. Have great weeks…
Here I am—–a cool, blustery day in Michigan. What a day to enjoy your box tutorial!!!! Thanks!!!! Now my sunny disposition will permeate the house making my ” hubby” happy too!!!
So pleased! Oh you need something to cheer up the cool blustery days…